In this chapter, you will learn how to use projects, which basically provide you with another useful way to illustrate analysis.
The difference: You can not only display analysis from one document, but use several documents, or configure your own custom screens. This is why the use of Projects is especially recommended, if you have to handle with a lot of documents and analysis.
In Figure 7.1, you can see how projects are structured.

Figure 7.1: The structure of a project
For each project, you will need to create Apps. In a second step, you can either attach existing documents to your App, or create a Custom Screen using Jscript. As we already know, Documents are structured in tabs, which will again show up in your Project.
To access your projects, click on "Projects" in the Navigation Menu.
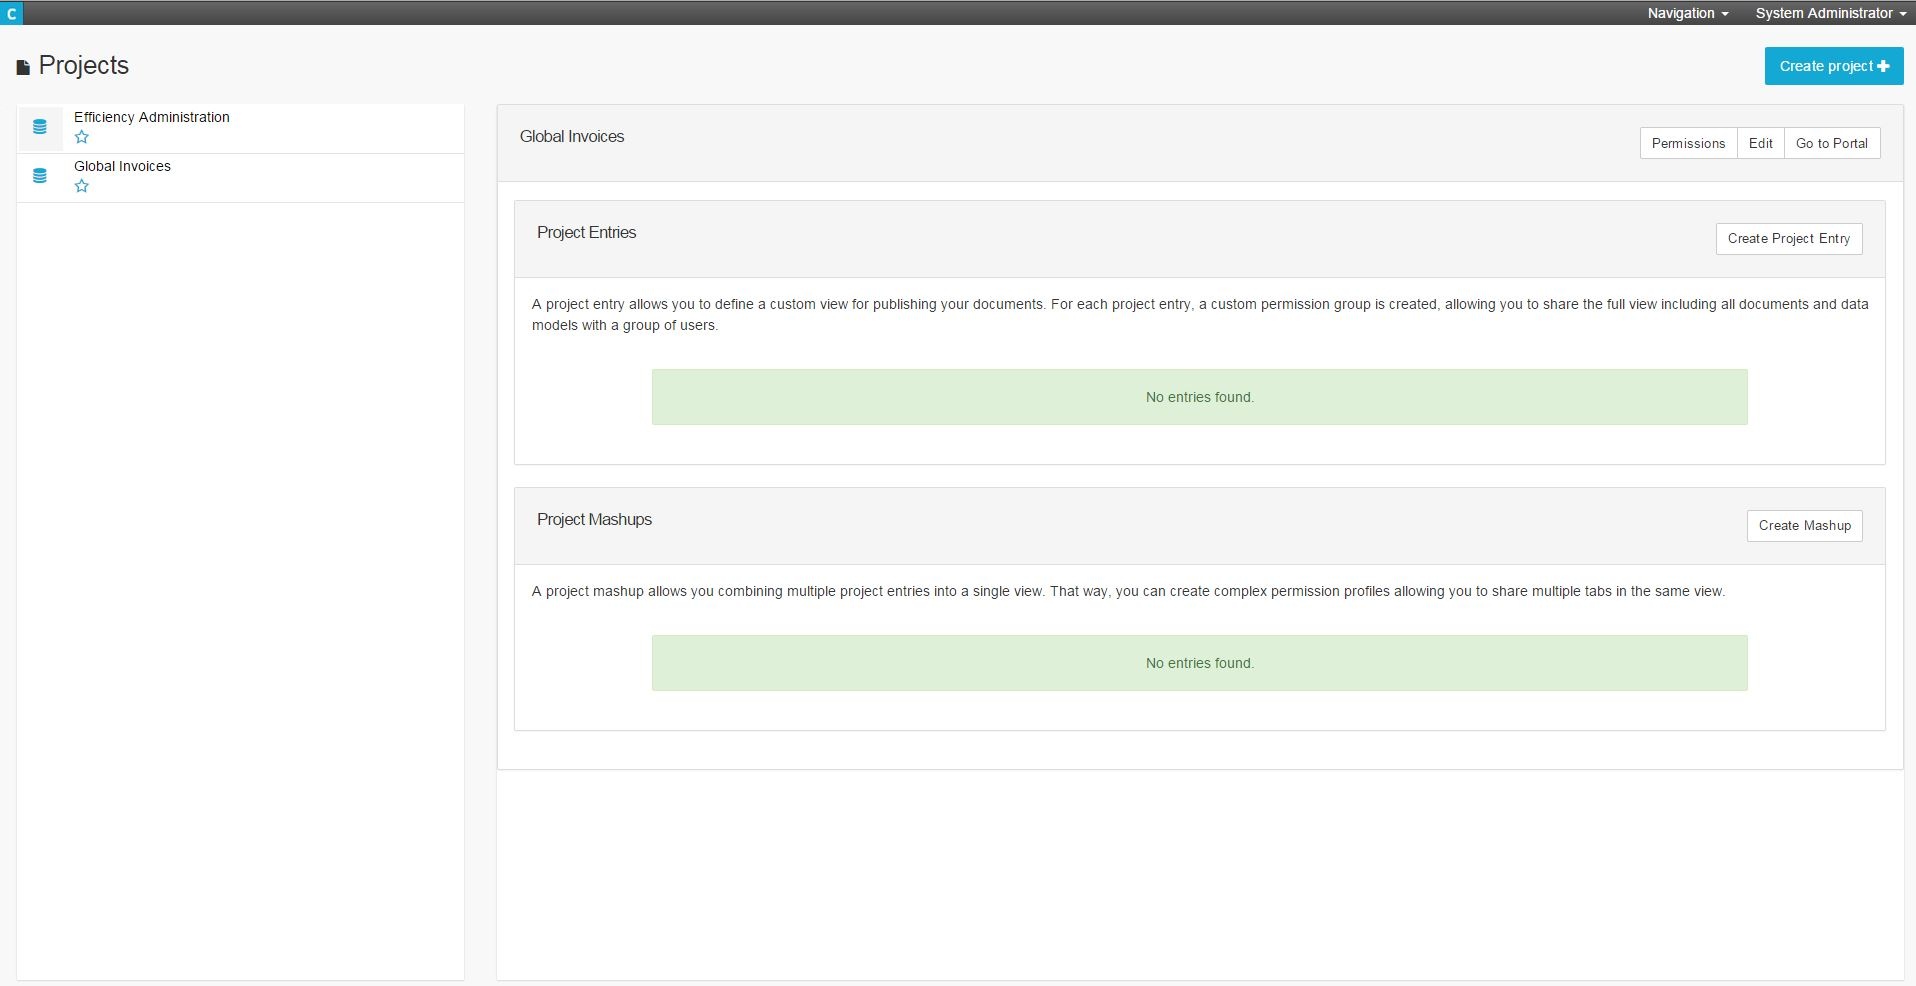
Figure 7.2: Project overview
In Figure 7.2, you see an overview over all existing projects. As you can see on the right side, no Apps (= Project Entries) have been created yet.
Please note: To access an existing project, you need to have the access rights by the author of the project. How to handle the access management will be explained later in this article.
First steps
To create a project, press the  button on the top right side. This option requires a "Portal Administrator" right (see User Management). Enter a Project Name and a Project Description, and press "Save".
After its creation, a project is empty at first. We do now need to create Project Entries (= Apps), which allow you to define a custom view for publishing your documents. Click on "Create a Project Entry" to get started. Again, please enter a Name and a Description to describe your Project Entry.
Project Entry Type
If you want your Project Entry to be made of existing Documents, then select Document here.
You can now click on "Add linked Doc.", to add as many documents as you wish to. To remove a linked document, press the red "Remove" button next to the document, that you want to delete.
To configure a customized Project Entry, you can also select Custom Screen. This will bring up two fields, where you can choose an existing template, and enter an optional report configuration.
Templates are provided by Celonis. If you are struggling with your templates, please refer to your personal agent or to our Service Desk.
Working with Projects
To access the "frontend" of your project, you need to open the Portal. Click on "Go to Portal" in the top right corner.
As the portal is a very new and customized feature, it is yet only available after a configuration of Celonis. Again, please refer to your personal agent or to the Service Desk.
Permissions
Permissions can be set with a click on "Permissions", which will open a window, which is shown in Figure 7.3.
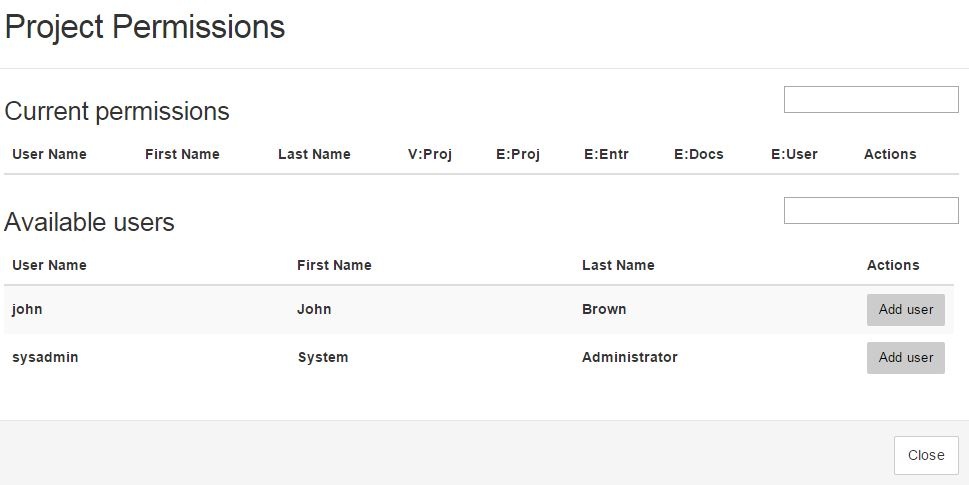
Figure 7.3: Project Permission
All registered users are listed at "Available users". To grant rights to a user, click on  a, which will move the user to the upper part ("Current permissions"), as can be seen in Figure 7.4:
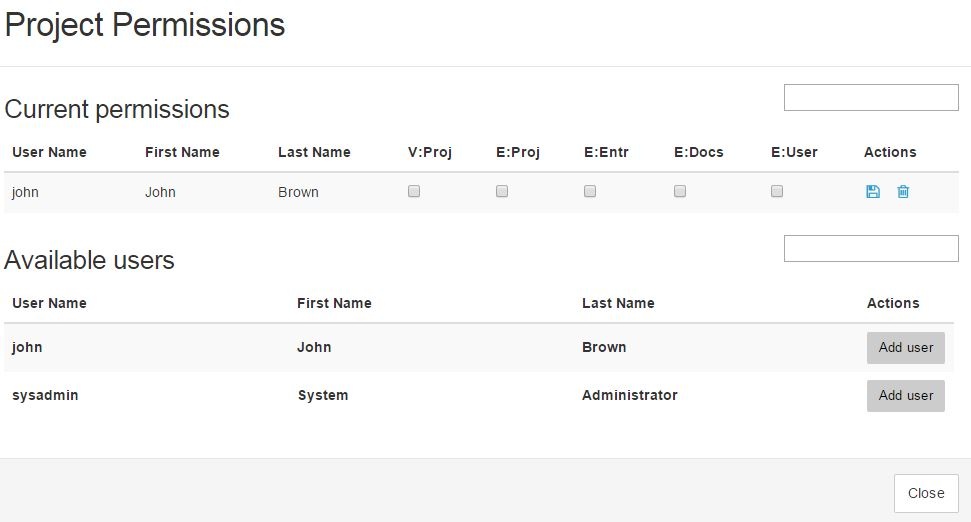
Figure 7.4: Set Permissions
For each user listed under "Current permissions", you can set the following user rights to access the access to the project.
- V:Proj: The user can View the whole project, but without an E: role, he won't be allowed to edit anything in the project.
- E:Proj: The user can change the basic project settings (name & description).
- E:Entr: The user can change the Project Entries (=Apps).
- E:Docs: The user can change the linked documents
- E:User: The user can change the Project Permissions and access the window that we are about to edit.
To remove all rights from a user, click the ![]() icon.
icon.