Please note that you can only share your own analyses (meaning analyses created by you) or analyses you have been granted Admin rights for with other users or groups! Please also keep in mind that whenever sharing a document, the user will only be able to view the shared analysis if he has been granted read access to the warehouse and data cube the analysis is based on. Warehouses and data cubes can be shared by anyone in the role of “Data Administrator”.
For sharing analysis with other users, you will need to return to the Doucments menu that can be accessed from almost anywhere inside the system by clicking on ![]() . On the right side of each document within the document list, you will see some symbols allowing for different modifications. You can either choose to Add Users
. On the right side of each document within the document list, you will see some symbols allowing for different modifications. You can either choose to Add Users![]() individually or to Add Groups
individually or to Add Groups![]() . If you choose to share your analysis with a group, the access rights granted to it will apply for all users within that group.
. If you choose to share your analysis with a group, the access rights granted to it will apply for all users within that group.
If you click on the symbol for either “Add User” or “Add Group” a dialogue window will appear.
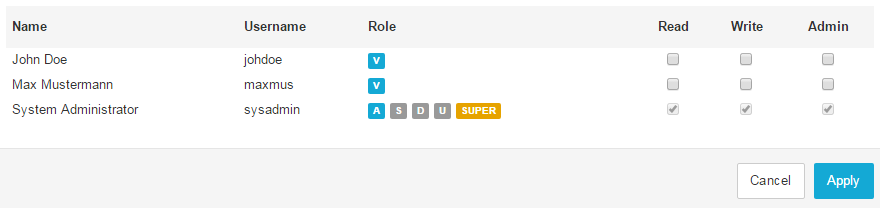
Figure 3.24: Share Analysis with Users or Group
Here, you can choose the access rights you want to give to each user or group:
- Read: The user will only be able to open and view the analysis but will have no rights to modify it (e.g. modify the content of existing components or add new ones).
- Write: The user will be able to open and view the analysis as well as to create, to modify and to delete tabs and components in the analysis.
- Admin: The user will be able to edit, delete and share the document.
Make your selection of access rights for each user or group and click on “Apply” to confirm your changes or “Cancel” to abort the process. After your confirmation, a small message will appear, informing you that your changes have been saved successfully. Also, the number shown next to the symbol for “Add User” or “Add Groups” will adapt to the current number of users or groups having access to the analysis.
For changing access rights already granted to users or groups, also simply click on the respective symbol to make the dialogue window with its current settings reappear. Apply your changes and click on “Save” to confirm.